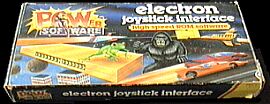
ELECTRON JOYSTICK INTERFACE
|
|
"This overlooked product isn't bad. The fact that it leaves the user with only a tape-based system smarts a little but...no-one knew for sure whether Acorn's official expansion would ever make it at the time it was released. Its original price was £24.95: twice that of its third party siblings but less than half of the ultimate official Acorn Plus 1. My own opinion is it was worthy of such a price tag. Its eventual failure was no doubt due to lack of publicity and the mess of the market at the time."
|
What It Does
The ELECTRON JOYSTICK INTERFACE is a 15cm x 7cm x 2cm creme coloured interface which plugs into the back of the unexpanded Acorn Electron computer. It needs a compatible 'switched-type' joystick. When connected to both Electron and joystick, it allows about 50% of games that originally do not have joystick-compatibility to be used with one.
Its Publicity
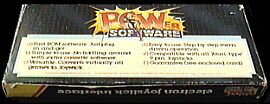
The ELECTRON JOYSTICK INTERFACE boasts the following on its back sleeve:
|
| 1) | Fast ROM software - just plug in and go! |
| 2) | Simple to use - No fiddling around with extra cassette software. |
| 3) | Versatile - Converts virtually all games to joystick. |
| 4) | Easy to use - Step by step menu-driven operation. |
| 5) | Compatible with all 'Atari-type' 9 pin joysticks. |
| 6) | Guarantee (See enclosed card) |
Fitting Instructions
| 1) | Ensure that the Electron is turned off. |
|
| 2) | Remove the plastic cover from the expansion bus connector at the rear of the Electron and store it in a safe place. | |
| 3) | Plug your joystick into the 9 pin D-type connector on the interface. | |
| 4) | Line up the interface socket with the Electron expansion bus connector and push the interface home with care. | |
| 5) | Power up the Electron. It all is well you should see the words "Power Software, Joystick Interface" added to the normal Acorn power up message. If this does not happen, turn off the Electron immediately, remove the interface and try fitting it again. If you still have problems, refer the matter to your dealer. |
Note: Never connect or disconnect the interface while the Electron is turned on, as this may cause serious damage to both the interface and your Electron.
Using Your Power Software Joystick Interface
| 1) | Type *JOY and then press the RETURN key. The computer will beep and you will be presented with the menu, a copyright message, brief instructions, and the prompt "up...method?". |
| 2) | Press either 1 or 2. (See General Details). The prompt will now read either "up...1-" or "up...2-". You have now selected the method of key detection for that direction. |
| 3) | Look at the instruction sheet for the game and simply press the appropriate key for the requested joystick position. |
| 4) | You have now configured the interface for the 'Joystick-Up' direction. Repeat procedures 2 and 3 for the joystick: down, left, right and fire positions. If you attempt to select a key more than once the computer will beep and print "Are you sure?" If you are sure then simply press that key again. If, in fact, you have made a mistake then press the correct key and continue with the selection process. |
| 5) | When all of the joystick positions have been configured the prompt: "Is this correct? (Y/N)" will appear at the bottom of the screen. Pressing "Y" will exit and clear the screen. Now follow the loading instructions printed on the inlay of your games cassette. |
| 6) | Do not at any time, between configuring the joystick and loading your games cassette, press the BREAK key. Note: A flashing cursor always indicates that the computer is expected input. |
General Details
In general, games programs determine whether a key has been pressed by one of two routes. For simplicity, we call these Method 1 and Method 2.
Method 1 is the most common, and we advise you to try this first. If you find that some or all of the positions on your joystick do not work with Method 1 then try Method 2 on these directions. If Method 2 still fails to work, then try changing the caps lock status before Method selection.
Technical Details
The Hardware
The joystick read only register is located at &FCC0. Bits 0 to 4 correspond to up, down, left, right and fire respectively.
These bits are normally set, but are cleared to reflect the status of the joystick.
The Software
Method 1 emulates OSBYTEs &79, &7A and &81 (with the Y register=&FF).
Method 2 emulates OSBYTEs &81 with the X and Y registers specifying a time limit.
See the ACORN ELECTRON USER GUIDE for more details on these calls.
Artwork And Images
The outer box and pictures of the interface itself are shown below. There is currently no emulated version of this interface available.
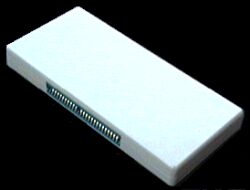 Front View [Connects to Acorn Electron] |
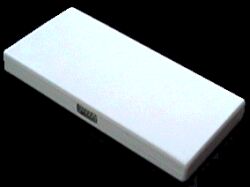 Rear View [Connects to Switched Type joystick] |

|
|
| Front View | Rear View |
The ELECTRON JOYSTICK INTERFACE was originally available in computer stores or by mail order from Power for £24.95. It is unquestionably one of the rarest interfaces about and has never yet been spotted in an eBay auction.