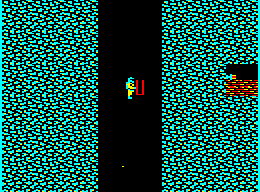
The Area Around The Rock Problem
Welcome back to the land of the Exile. We won't finish the mammoth journey this issue I'm afraid but never fear I will be here next issue to guide you all through the "Endgame".
Click here to go to steps 1 to 86 of the complete solution to Exile.
| Step 87 Go into the transporter to the left of the windy tunnel, in the one right of where the icer was and then go right. |
 |
| Step 88 Drop down to the pool. |
 |
| Step 89 Pick up the flask and bring it back up to the transporter. Switch it on and teleport back to the windy tunnel area. Drop down to where Chatter is and drop the flask. |
 |
| Step 90 Turn off the transporter. Remember. |
 |
| Step 91 Pick up the flask and thrust over to the now locked door and leave the flask there. |
 |
| Step 92 Teleport, remember, switch on the transporter, go in and collect three grenades before teleporting back. |
 |
| Step 93 Next go above the transporter, remember and then thrust across. Then drop the RCD to hold open the door below again. Teleport and thrust down the left of the windy tunnel and across to take the flask past the door. |
 |
| Step 94 Remember twice, go get and store the RCD, teleport, remember and pick up the flask. Go right, past along under the power pod store and up the vertical passage. |
 |
| Step 95 Go near to the top onto the horizontal ledge on the right. Put down the flask, remember, check your pockets so the RCD comes out last, select icer and set your aim at an angle downwards. |
 |
| Step 96 Pick up the flask. Now go right, into the passage above on the right. |
 |
| Step 97 Drop down the vertical passage and remember when you are clear of the mushrooms. |
 |
| Step 98 Drop the flask on the pillar. |
 |
| Step 99 (You are supposed to fill the flask at the pool in the vertical passage to the east but this is a very long journey and you are very lucky to shoot the flask through the opening without it spilling before reaching the fire!) Face right and fire down to the corner of the slab to kill the bees. |
 |
| Step 100 This may take half a dozen shots or a lot more. Lie down, and adjust your aim so that they catch fire and blow the nest. Try a grenade for good measure. |
 |
| Step 101 You will be protected from the final explosion by the door. |
 |
| Step 102 Pick up the flask, centralise aim, lie down, then throw it at the crack. |
 |
| Step 103 Shoot it so that it clears the fire. When it hits the switch... |
 |
| Step 104 ...you will be pushed through and must full-thrust left to clear the fire before you automatically teleport. (Keep blasting at it with a weapon until this happens!) |
 |
| Step 105 Put the flask against the switch so that it is pushed in and remember twice. |
 |
| Step 106 Now gently hover well above the fire until you are in the middle of it. |
 |
| Step 107 Fully boost-thrust down to get through it. |
 |
| Step 108 Select icer, aim straight up, throw RCD and shoot it through the fire. |
 |
| Step 109 As soon as it falls towards the flask, stand on the slab and thrust down. |
 |
| Step 110 The boulder you can ignore at this stage (as it's only needed if the other one is lost, and is easier to get out with the plasma gun anyway). |
 |
| Step 111 Fly to the left and collect the key. |
 |
| Step 112 Teleport, store RCD and pick up flask. Select icer, thrust over the fire and throw/shoot the flask through the crack again. Thrust through after it. |
 |
| Step 113 Pick it up and go up the vertical passage. |
 |
| Step 114 Go left then drop down to the bottom, remember then leave it there. |
 |
| Step 115 Go back to the locked door at the windy tunnel and open with the RCD. |
 |
| Step 116 Drop the RCD just past it and then teleport back to the flask. |
 |
| Step 117 Remember twice. |
 |
| Step 118 Go right and throw/shoot the flask to the corner of the red bush. |
 |
| Step 119 Select jetpack, centralise aim and scroll left. [This last bit's very important - Gus] Stand on the flask, thrust up and right and roll over and over until you work your way through the crack. Select icer as you near the end and as soon as you are clear, get a grenade out. |
 |
| Step 120 Move forward to the small hollow below then throw both this grenade and a second one to blow up the beehive. |
 |
| Step 121 Hold any bees off with the icer. If you fail, you need to go back to grenade-machine, and get more grenades before continuing. |
 |
| Step 122 Remember, go right and fire at the large block to move it. (Most solutions involve getting this block down to the green frogmen and getting the pink frogman help you push it along. I miss this bit out.) |
 |
| Step 123 Drop down the first opening after moving the block... |
 |
| Step 124 Then take the first left, keep left and go down... |
 |
| Step 125 Until you are just right of a red bush. |
 |
| Step 126 Remember. Select icer and go right. The gargoyle will be shooting fireballs. Lie down so that your hand is not sticking out from the ledge and then shoot so that your bullets just pass the nose of the gargoyle. |
 |
| Step 127 The fireballs should explode next to the gargoyle and blow it and the one below. This either takes a dozen shots or you may be there ages. If the gargoyle is flashing, but the fireballs are not exploding around it, stop firing for a moment. It may just be that your timing is off. |
 |
| Step 128 Remember, set aim, thrust down the windy area then go straight down to the samll opening on the right and remember. |
 |
| Step 129 The four birds in the diagonal passage to the right will come out. Let them fly above you so you can kill them all by firing upwards. Drop to the bottom then go left to the water and remember. |
 |
| Step 130 Scroll down and right, thrust down the left side of the water... |
 |
| Step 131 And then go slowly up the diagonal passage on the left. |
 |
| Step 132 Quickly get and store a pirahna... |
 |
| Step 133 Teleport, remember and check that the pirahna's in your pocket. |
 |
| Step 134 Go down the right side of the water and scroll the screen right and down before going into the little opening and remembering. |
 |
| Step 135 Pick up the big fish. Go gently with it as any knocks and it may swim off. |
 |
| Step 136 Go down. |
 |
| Step 137 Now walk left through the mushrooms. Stop at the first vertical opening and scroll left. |
 |
| Step 138 Wait until the mushrooms wear off then go up with the fish to the passage with the coronium rock. |
 |
| Step 139 Remember twice then go up the rest of the vertical passage and release the fish to kill the piranha fish. Don't get involved in the battle though as you might drop the one you have. |
 |
| Step 140 Teleport back to the coronium rock and pick it up. Remember. |
 |
| Step 141 Drop down the left side of the vertical passage and walk left. When you get to the first hollow, remember, drop the rock and thrust up when the mushrooms wear off. Go right and remember in the diagonal passage. |
 |
| Step 142 Stand a little way from the bush and very quickly get and store the piranha [It's best to tap G and S practically simultaneously! - Gus] until the radiation immunity pill is sucked right through. Get it and teleport back to the rock. |
 |
| Step 143 Go back through the mushrooms to the main vertical passage and thrust up to surface when the mushrooms wear off. You now have to shoot the rock back to the edge where you originally shot the gargoyle, which takes a long... |
 |
| Step 144 ...long... |
 |
| Step 145 ...long... |
 |
| Step 146 ...long... |
 |
| Step 147 ...time. Drop the rock. Remember and save. |
 |
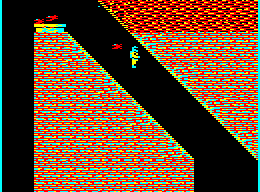
The Rock ProblemThe next part is very, very difficult. It is best to save the game as soon as you've completed anything substantial and you'll soon seen why. A diagram showing this part of the solution is included on this EUG disk to ensure clarity. As an incentive to those using Exile on tape though, I can play through the whole game without saving. This is the only part which occasionally fails.  |
|
| Step 148 Scroll up and right. Get the rock to the end of the passage above without the red bush seeing it. Remember and drop the rock. Scroll down and thrust over the bush. Go down the deep hollow to its left, remember twice then go back to the rock. |
 |
| Step 149 Scroll up and centralise aim then pick up the rock. Save. |
 |
| Step 150 Go very, very slowly left and as soon as you start to get sucked into the mushrooms, throw the rock, teleport and scroll down and left. Wait for at least a minute. |
 |
| Step 151 Ideally, as you wait the rock will be flung down into the hollow and come to rest next to you. |
 |
| Possibly you will also be lucky and it will fall onto the ledge above to the left. You can check to see by flying up very slowly but make sure to keep the red bush off screen. In either of these cases, save then slowly go up the left and crawl left along the ledge. Remember before the mushrooms with the rock then throw/shoot it until it is well clear of the mushrooms. There needs to be a space of about an inch between it and them. If you end up facing the wrong way, leave the rock, teleport back, remember and thrust through again when the mushrooms wear off. Save. When it all goes wrong, the rock will go into the red bush and you need to start again with a saved file. The rock may land on the ledge above but to the right of the hollow. If so, do not try to get it - it will simply be sucked into the red bush and you will need to start again. Instead, scroll the screen left, go slowly left up the left side and then up slowly towards the red bush and, again, when the mushrooms begin to suck, teleport back to the deep hollow and wait again. The rock may be flung near to where you first started. Just repeat. |
|
| Step 152 You need two rocks. |
 |
| Step 153 Bring the one up from where the birds were. |
 |
| Step 154 This one must just clear the mushrooms so as not to collide with the first. |
 |
| Step 155 Save then teleport all the way back to the spaceship. |
 |
| Step 156 Go down and to the transporter to the right of where the icer was. (The left one must stay off as an exit from the east!) Go into it and into the one in the west... |
 |
| Step 157 And drop the boulder down to near the transporter. |
 |
| Step 158 Remember then thrust across the windy tunnel. Store the RCD. |
 |
| Step 159 Continue along. Get the flask... |
 |
| Step 160 And bring it back to Chatter. |
 |
| Step 161 Pick up the boulder and thrust down the windy tunnel to the second opening on the right. |
 |
| Step 162 Remember. Pick up the first rock... |
 |
| Step 163 ...take it up the windy tunnel into the transporter... |
 |
| Step 164 ...into the transporter to the right... |
 |
| Step 165 ...and put it on the portal in the west. |
 |
| Step 166 Teleport, put the second one into the windy tunnel to drift up while you take the boulder to the ledge at the top again. |
 |
| Step 167 Get the second rock to the west, remember, hover with the second rock directly over the first then thrust up as far as you can. |
 |
| Step 168 Drop it and, as the two collide, there will be a spectacular explosion blowing the portal up. It's worth being forced to automatically teleport just to see it! |
 |
| Step 169 You will need to transfer energy to the blaster and plasma gun when they are collected. |
 |
| Step 170 Check your energy levels and, if they're full, also bring Chatter to the west. |
 |
| Step 171 Push/shoot him along, as he tends to drift away when activated. |  |
| Step 172 Scroll up and right. Drop down the blown portal and remember in the pool. |
 |
| Step 173 Now scroll right fully and boost-thrust left and down to avoid the gargoyle's fire. |
 |
| Step 174 The gargoyle is best killed by getting on the small ledge where he is, standing up, facing right, aiming upwards and continuously blasting with the icer. Aim directly for his nose. |
 |
| Step 175 Make sure your protection suit is fully charged as he will cause you quite a bit of damage when he finally explodes. |
 |
| Step 176 Drop down the vertical passage and take the second one on the left. |
 |
| Step 177 Now go down again into the little opening on the right with a switch on the other side. |
 |
| Step 178 Remember. |
 |
| Step 179 Go back up then into the passage on the left and remember again. Come back down to go left and meet the first teleporting robot. Fire a couple of shots and when he attacks, teleport. When he appears again, teleport to next to the switch. |
 |
| Step 180 Now quickly thrust across to where you first met him. |
 |
| Step 181 Remember twice just past the red bush, select icer and set aim to just below central. |
 |
| Step 182 Go down the next opening, keeping to the left side. Drop slowly down. |
 |
| Step 183 When you get to the hive, thrust up slightly so that you stay flat against it. |
 |
| Step 184 Blow it with the icer and the blaster will drop down below. |
 |
| Step 185 Get it and transfer the pistol contents to it. It uses lots of energy but sure shifts the baddies! |
 |
| Step 186 Now teleport back to the red bush, scroll right and select blaster. |
 |
| Step 187 Crawl along left and quickly get past the imps. |
 |
| Step 188 As you drop down, remember a couple of times and drop the RCD. |
 |
| Step 189 Go to the door with the mushroom immunity pill on the other side and remember your position. |
 |
| Step 190 The prescribed method for getting the pill out is to get the slimes below past the red drip, feed it with a converted mushroom and finally direct the red drips onto it to convert it into a coronium rock. You have to go through this procedure twice and take each rock to the door. If anything goes into the red bush, it's all over and if you try this method you'll probably agree that it's just far too hard, especially as it's all set in a windy area. |
 |
| Step 191 Save your position. Then try instead this very easy way. Be warned though, it doesn't always work first, second or even third time and you should always have at least two remembered positions well away from the door. Stand facing the door, select icer and wait. Shortly, the teleporting robot will appear either to the left or right of you, although left is more probable. |
 |
| Step 192 If he is to the left, hold down the walk right and pick up keys as he fires. There will be general confusion (and you will be hurt!) but if all goes according to plan, you will be propelled just far enough through the door to snatch up the pill. You can also try the strategy of blasting back with the icer if your suit starts flashing. If you scare off the robot, he will come back again and you can keep trying. |
 |
| If he appears to the right, next to the pill, press the same keys and the pill will be forced through.
Yet another possibility is, when you have to blast the robot away, the pill may be moved away from the door. Go left then run at the door pressing the pick up key and you may be able to collect the pill as the bush blows it left. |
|
| Step 193 Retrieve the RCD and then save your position. Make your way back to the pool below the entrance to the west and remember twice. Go back up through the portal, up and right and into the transporter to the windy tunnel area. Stand under the switch to activate the engines, remember and then wait for the robot. If he appears to your left, let him follow you to the door then teleport back to the switch and blow him! |
 |
| Step 194 Teleport back to the pool in the west. |
 |
| Step 195 Push Chatter down to the pool and activate him. |
 |
| Step 196 Go right and down, keeping Chatter close by. Do not go into the passage with the mushroom as you will alert two fireballs and you need the fireproof device to pass these. |
 |
| Step 197 Drop to the next opening on the right and remember. |
 |
| Step 198 Then let Chatter push you along before you teleport so you are behind him. Now push him along and watch him take on the invisible birds. Thrust across as far as you can to the right and use the blaster to kill the birds. Remember twice in the hollow below the fire. |
 |
| Step 199 When all the birds are no more, go to the ledge above and to the left of the gargoyle releasing lightning bolts. Whistle for Chatter then disable him and push him off the ledge so he lands on top of the gargoyle. (You might alert the second teleporting robot. If so, just chase him with the blaster for now. It's possible that he will reappear next to the gargoyle and get blown up.) |
 |
| Step 200 Now drop down towards the gargoyle and use the blaster to force Chatter towards the plasma gun. You will probably be forced to teleport. Hover just above the lightning, select the icer and shoot at the right hand corner of the gargoyle until it flashes. |
 |
| Step 201 Now activate Chatter and continue firing. |
 |
| Step 202 His fire and yours will blow the gargoyle to pieces! |
 |
| Step 203 Disable Chatter before he wanders off and get the plasma gun. |
 |
| Step 204 Go back under the fire on the right. Drop right down directly underneath it and remember twice. |
 |
| Step 205 Then select jetpack, scroll down and full boost thrust up and right to get through the fire. |
 |
| Step 206 Collect the fireproof device. |
 |
| Step 207 If the robot was not destroyed by the gargoyle... |
|
| Step 208 You will have to go back to the engines again to take care of him |
 |
| Step 209 Remember twice next to Chatter, select blaster and go straight up from where the gargoyle was, into the passage on the left. |
 |
| Step 210 Keep the screen scrolled right; there are more invisible birds! Go up at the end of the passage and then left through the mushrooms. Get back to the pool, remember twice and then go to the engines to blow the robot. Teleport back to the pool. Remember. Go left and scroll up. Now drop down the left side and remember on the little ledge. |
 |
| Step 211 Select blaster and thrust into the little opening on the left to press the switch once. |
 |
| Step 212 Use the blaster to keep the wasps at bay then teleport back to the pool and remember. Go right and drop right down to the ledge on the right. Check the door below and left has been closed by the switch then teleport back to the pool. |
 |
| Step 213 Go right and then down and right through the mushrooms and back to Chatter. Using the mushrooms nearby... |
 |
| Step 214 And the fire... |
 |
| Step 215 And the coronium crystals for Chatter... |
 |
| Step 216 You should now whistle at Chatter, collect the power pods he produces and fill your energy levels for every weapon (32 units for each). |
 |
| Step 217 Activate Chatter and lead him back up through the previous route then slowly take him to the locked door. |
 |
| Step 218 Remember at the door, go right and, when he follows, teleport and then push him. |
 |
| Step 219 He will destroy the imps in your path. |
 |
| Step 220 Afterwards, get in front of him so he can push you through the crack. |
 |
| Step 221 Select the plasma gun as soon as you are through to kill the blue frogman. Thrust through the next crack. Immediately select the blaster to waste the yellow maggots. |
 |
| Step 222 Drop down to locate and get and store the CannonRCD. Teleport out and disable Chatter. |
 |
| Step 223 I usually leave Chatter here as he is not much use in windy or narrow areas. You can either stock up with his energy or leave it just in case of emergency. |
 |
| That's it for this issue, folks. Instead of adding the best of my method to your own though, why don't you fellow Exilers exchange your solutions? I only use the above as a rough strategy. Each adversary has its own will and I have taken each on in many different ways. | |
John McHugh, EUG #17
Continue To EXILE SOLUTION #3, EUG #18