Introduction
Computer-based techniques can lead a student to a clearer understanding of problem areas in a subject. The Letts Keyfacts Revision Software provides suites of programs specifically designed to develop insight into these areas of difficulty. Each package contains up to 10 interactive programs based on major topics found in all the current 16+ (O-Level GCE, CSE and GCSE) syllabuses.
As an integral part of a revision scheme the programs will assist understanding and reinforce learning. A variety of approaches is used to maximise the student's interest and to introduce an element of enjoyment of home study. Graphics are presented in an imaginative, interactive way as a positive teaching aid. An illustrated booklet provides information on how to get the most out of the programs.
Physics
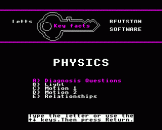
Ten interactive programs, approved by subject teachers and tested by students are contained on the two cassette tapes. Topics included are:
- Introductory diagnostic program
- Relationships, equations and their units
- Motion I: speed, velocity and their units
- Motion II: force momentum, energy and power
- Current electricity
- Electricity and magnetism
- Waves
- Light: ray diagrams
- Heat: experiment simulations
- Radioactivity and atomic structure: experiment simulations
How to Use the Programs in a Revision Scheme
The programs on these cassette tapes have been devised to make your revision more approachable and enjoyable. Organisation is the key to making the most of your revision time. For each subject follow these simple rules.
- Know your syllabus. A quick reference to the relevant syllabus analysis table to be found at the front of Letts Study Aids Revise series is advised.
- Devise a timetable, as soon as the Mocks are over, which will allow you to go through they syllabus at least twice (more for problem areas).
- For each topic, read all your available material - class notes and textbooks. Make summary notes as you go, then test yourself. Keyfacts Multiple Choice or Letts Study Aids Objective Questions will give invaluable practice and help. Finally, run the relevant computer program which will both test your knowledge and give you another perspective.
- Just before the examination, use all your summary notes to jog your memory and the whole subject program suite to reinforce your understanding.
- You can use the diagnosis program at the beginning of your revision to find your strengths and weaknesses.
The Programs
|
Tape 1
Side A Diagnostic questions ("DIAGNOS") Relationships ("RELATE") |
Side B Speed, velocity, acceleration ("MOTION1") Force, energy, work, power & momentum ("MOTION2") Light rays ("LIGHT") |
|
|
Tape 2
Side A Radioactivity experiments ("RADIO") Multichoice questions on waves ("WAVES") |
Side B Current electricity ("ELECT1") Multichoice questions on electricity & magnetism ("ELECT2") Heat ("HEAT") |
1. Diagnostic questions ("DIAGNOS")
You are presented with the following options: Diagnostic section Test conditions Sound on/off
Press RETURN when the arrow is against the option you want.
You should try the Diagnostic section at the beginning of your revision. Save the Test conditions until the end.
In the Diagnostic section, 40 questions are presented in turn. If your answer is correct, the next question is given. If your answer is wrong, the answer is shown.
At the end of the section, the computer reviews your responses and recommends a method of study.
In Test conditions, the computer presents each question in turn. You select an answer and the computer moves to the next question. At the end of the test, the score and time taken are shown. The numbers of any incorrectly answered questions are also given. You should take 40-50 minutes.
2. Relationships ("RELATE")
Physics is about relationships: Or, put another way, it is about how one thing depends on another. Or there are a lot of equations to learn.
You need to understand these equations as well as learn them. This isn't so bad. If you understand an equation it is much easier to remember it. Sometimes you may even be able to work out the equation if you have forgotten it.
This program will help you to understand equations. In addition, there are some thints on remembering equations and some practice tests.
3. Speed, Velocity, Acceleration ("MOTION1")
This program covers the topics of speed, velocity, acceleration and equations of motion.
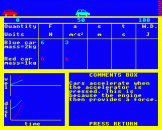
As cars move across the screen, graphs and tables are drawn to describe the motion. After introducing each section, problems are set. To solve the problem you can either use graphs or one of the following equations of motion:
| 1. | u + v | s | 2. | a = | u - v | 3. s = ut + ½at² | 4. v² = u² + 2as | ||||
| ------ | = | --- | ------ | ||||||||
| 2 | t | t |
When you are in a problem section you will see that part of the table is not being filled in when the cars move. Then, when either you press RETURN or the cars crash, the empty space is filled in but the number keeps changing. You have to press RETURN when the correct number is shown. The figures are only shown to one decimal place, so you may not agree exactly with any of the numbers presented. Choose the one nearest to your answer.
4. Force, energy, work, power & momentum ("MOTION2")
It is suggested that you try "MOTION1" first. "MOTION2" uses the same presentation as "MOTION1" and covers the following topics: force, friction, work, energy, power and momentum.
After you have finished the program find, from 'For practising examination questions' at the back of this booklet, some momentum problems which involve explosions, elastic and inelastic collisions.
5. Light rays ("LIGHT")
The following options are available in this program: Reflection, Curved Mirrors, Refractions, Lens and Defects of the eye.
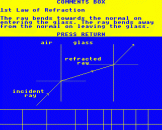
In each section you are given some information and are shown diagrams - then there are problems to solve.
The "Reflection" and "Refraction" problems share a similar presentation. A diagram is drawn and some numbers are presented. One of the numbers keeps changing. Press RETURN when the correct number is shown.
At the end of "Defects of the eye", you have to select the correct type of lens for long-sightedness and short-sightedness. The diagrams for before and after, whether right or wrong, are all shown.
There are two sets of problems in "Curved Mirrors" and "Lens":
| Set 1: | The computer positions the object on the ray diagram and you describe the image. Select the correct rays so that the two rays cross and the computer can draw the image. Then select CHOOSE ANSWER and pick the statement which correctly described the image. |
| Set 2: | Before the ray diagram is drawn, you can alter any or all of these variables: h, u or f. You should now draw the ray diagram on paper and then check your answer with the computer. To do this, select rays until the image is drawn. On selecting CHOOSE ANSWER, numbers to do with the image are shown. One number keeps changing. Press RETURN when the correct number is shown. The computer can produce much more accurate answers than you can with your ray diagrams. Select the number that is nearest to your answer.
You can experiment with an endless number of situations. Can you push both the object and the image off the screen? |
6. Radioactivity experiments ("RADIO")
This program simulates a range of experiments on radioactivity. By combining "16+ knowledge" with some detective work, solve the problems presented. There are three parts:
-
Detection experiment
In this experiment you have to detext the kind of source present. You do this by moving the equipment around the screen (See page 2) and noting the effect. If you have problems, you can look at the hints and explanations. -
Rutherford experiment
This is a simple simulation in which you have to determine what happens to x particles when they hit a thin film of gold. The computer presents a description of the atom. This description explains the results of the simulation. The hints are not so useful in this section of the program. -
Decay problems
In this experiment you have to determine the kind of radiation that is being emitted. Then you choose the correct decay products. You will have to know how radioactive elements decay before trying this experiment.
7. Multiple Choice Guestions On Waves ("WAVES")
The two multiple choice programs use the same method of presentation. At the beginning of each program you are given the following options:
Hints, answers and third chance Test conditions Sound on/off
Press RETURN when the arrow is against the option you want.
Hints, Answers and Third Chance
You should try this option when you are starting your revision; save the test conditions option till later. In this first option, the computer presents each question in turn. If your answer is correct, the next question is shown. However, if your answer is wrong, a hint is given and you try again. If your second answer is correct, the next question is presented. However, if your answer is still wrong, the correct answer is shown. The question is then changed slightly so that you can have a third chance.
8. Current electricity ("ELECT1")
The aim of the program is to help you understand current electricity. It uses a water model. Simple ideas of pouring, squirting and pumping are used to explain the features of current electricity.
You can check your understanding by answering the questions presented. It is also possible to experiment by altering some of the variables.
9. Test Conditions (Electricity & Magnetism) ("ELECT2")
The computer presents each question in turn from option 7. At the end of the test, the score and time taken are shown along with the numbers of any incorrectly answered questions. You should take 20-25 minutes.
10. Heat ("HEAT")
This program simulates heating and cooling experiments. As the experiments proceed, a thermometer, the graphs and the data show the effects of the heat changes. The program is in three parts.
-
Introduction
In this section you are given some information and shown some examples of heat changes. Press RETURN each time you want to move on.At the end of the introduction you can try changing things to see what happens. Wait until the arrow is against the number you want to change then press RETURN. The numbers can be changed by pressing the up or down arrow keys. Remember, SPACE will make the change quicker. When you have finished the alteration press RETURN again. To see the effect of the change, press RETURN when the arrow is against Heat bag or Cool bag. If the simulation exceeds the temperature range of -159°C to 159°C, there is a "crash" noise and the program returns to the beginning.
N.B. Red background: heating Blue: cooling Black: resting
-
Experimenting
This is like the last stage of the introduction, but now you have to alter things so that you reach the right temperature at the end of the experiment. Tricky! -
Problems
By now you will have remembered that all this is to do with these two equations:- When a material is changing temperature:
heat change = mass * specific heat capacity * temperature change J kg J/kg°C °C - When a material is changing state:
heat change = mass * specific latent heat J kg J/kg
This section of the program lets you practise these equations. First of all an experiment is simulated, and then all the data is presented. However, one of the numbers keeps changing. You have to press RETURN when the correct number is shown. The sound tells you whether or not you get it right and besides, the correct answer is displayed after you have responded.
- When a material is changing temperature:
Abbreviations Used In The Programs
|
|


