Introduction
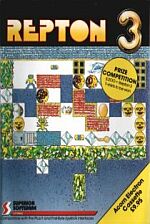
Repton 3 - Are you ready for the ultimate challenge?
Our original Repton game was immediately acclaimed as a refreshingly new concept: a game requiring dexterity to complete its arcade-style elements, and clear logical thinking to solve its strategic puzzles. Repton involves retrieving treasure whilst avoiding falling rocks, fearsome monsters and haunting spirits. "This is an astounding game reaching new heights in BBC arcade adventure," enthused The Micro User magazine.
Repton 2, released last Christmas was larger and much more challenging than before. Acorn User wrote: "Repton 2 is better than anything I've played on the BBC Micro or Electron. Brilliant!"
Now, available for the Commodore, Amstrad, BBC Micro and Electron, we proudly present Repton 3. A screen-designer is included for devising your own game screens. There is also a character-designer which enables you to redesign any or all of the game's characters.
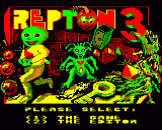
Repton 3 is much larger than its predecessors - it has 24 fascinating screens. All the favourite Repton characters have been retained, together with several new ones: a creeping poisonous fungus, time capsules and golden crowns.
Can you complete Repton 3?
Playing Instructions
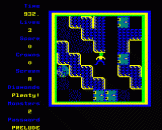
Repton 3 has a total of 24 game screens. These are provided as three files with eight game screens in each:
File 1: PRELUDE
File 2: TOCCATA
File 3: FINALE
The PRELUDE file is loaded automatically when the Repton 3 game is first loaded.
The PRELUDE, TOCCATA and FINALE files are on side 2 of the cassette. To load any of these files, simply select the "L" option on the main Repton 3 screen, and enter the appropriate filename.
Game Objective
In order to complete Repton 3 you must carefully determine your routes through each screen in turn, with the aim of defusing the time-bomb by passing over it. However, before the time-bomb can be defused, you must first:-
- collect all the diamonds (including those concealed in safes or cages),
- collect the golden crown, and
- kill all the monsters.
Each screen has a time-limit and, if you do not complete the screen within this time-limit, the time-bomb will explode and you will lose a life. Repton can, however, travel backwards in time because whenever a time-capsule is collected, the time-bomb's clock is reset.
Each screen comprises a series of puzzles. Many of these are interlinked and you may have to solve a number of small puzzles to enable you to tackle a large one. The puzzles may, in some cases, seem impossible - but we assure you that Repton 3 can be completed.
Rocks will fall if unsupported and should one land on you it will kill you. You must also avoid the monsters, spirits, skulls and fungis - contact with these is fatal.
When an egg falls, it cracks upon landing and a monster hatches out. The monsters are killed by pushing or dropping rocks onto them.
There may be up to eight spirits on each screen. They always follow the walls to their left until they reach a cage. When a spirit enters a cage, it changes into a diamond. A spirit may become dazed if you drop a rock onto it or collect all the diamonds immediately surrounding it. This is to be avoided as the spirit will then move endlessly in a small circle.
Watch out for the poisonous fungus which grows incessantly sealing your fate. Trap it in by surrounding it with rocks if you can, or you may never live to collect the golden crown.
Your route may be blocked by a safe. If so, you must locate a key which will open all of the safes on the screen revealing a diamond within.
Each screen may have a maximum of four transporters. They cause you to be rematerialised at some other location on the screen, but each transporter can be used once only.
Game Controls
Z - Left, X - Right, * - Up, ? - Down, M - View Map (Screens A-E only)
ESCAPE - Kill Yourself (Useful if you become trapped), SHIFT-R - Restart Game
P - Enter Password, L - Load Data File, S/Q - Sound On/Off
K - Select Keyboard Control, J - Select Joystick Control (Plus 1 Interface)
F - Select Joystick Control (First Byte Interface)
Scoring
5 points ............. for collecting a diamond
20 points ............... for killing a monster
50 points .............. for collecting a crown
The Repton 3 Series Editor
The Editor is loaded from side 1 of the cassette by selecting option 2 on the loading screen menu.
The Screen Designer And Character Designer
We recommend that you carefully read all the instructions in advance and experiment with the controls before attempting serious design work.
Screen Layout
   1  2  3  4
   ______________________________________________
   |/_V_|/_OPTS___|/_CHAR___|/_MAPS___| |XXXXXXX|
   |       5 |___|___| 6
   |       7 |___|___| 8
   |       9 |___|___| 9
   |       11 |___|___| 12
   |        |_______| 13
   |        |XXXXXXX|
   |        |X X|
   |        |X X| 14
   |        |XXXXXXX|
   |        |  |
   | 17      |_______|
   |        |_|_|_|_| 15
   |        XXXXXXXXX
   XXXXXXXXXXXXXXXXXXXXXXXXXXXXXXXXXXXXXXXXXXXXXXXX
   XXXXXXXXXXXXXXXXXXXXXXXXXXXXXXXXXXXXXXXXXXXXXXXX
Key
- Pull-Down Notice: This details the version of the game in use
- Pull-Down Menu: OPTS - options
- Pull-Down Menu: CHAR - see Character
- Pull-Down Menu: MAPS - see Screen Designer section
- Select keyboard control (default setting). The keys used are:
Z - Pointer Left, X - Pointer Right, * - Pointer Up, ? - Pointer Down, RETURN - Execute - Select Screen Designer
- Select Joystick Control
- Select Character
- Define Time-Limits - see Screen Designer section
- Define Passwords - see Screen Designer section
- Save Data File - see Saving and Loading Files section
- Load Data File - see Saving and Loading Files section
- End Zone - terminates currently selected mode
- Currently-Selected Character Window
- Colour Selection Pallette
- Pointer - moved by using the keyboard, joystcik
- Main display area
Using Icons
- Move pointer over icon required
- Press RETURN to select
Note: Before selecting a new icon, it is necessary to confirm completion of the previous mode by moving the pointer to the End Zone (icon 13) and pressing RETURN.
Saving And Loading Files
| Loading: | 1. | Select the Load Data File icon (icon 12) |
| 2. | Enter the name of the file you wish to load | |
| 3. | Press RETURN and wait until the pointer re-appears |
Note: The program will not allow you to edit any of the supplied Repton 3 game screens unless you are able to give the appropriate edit code numbers (displayed after each screen has been completed).
| Saving: | 1. | Select the Save Data file icon (icon 11) |
| 2. | Give your file a name | |
| 3. | Press RETURN and wait until the pointer re-appears |
The Character Designer
- Select the Character Designer by selecting icon 8.
- Select a character for editting from the full set of minature character icons displayed at the bottom of the screen.
- Choose a colour from the pallette (icon 15) by moving the pointer to the colour and pressing RETURN.
- Move the pointer to the main display area.
- Fill in pixels as desired with the chosen colour by moving the pointer and pressing RETURN.
- Repeat steps 3-5 until you are satisfied with the redefined character.
- Repeat steps 2-6 if you want to redefine other characters.
- Select the End Zone icon (icon 13) when you have finished redesigning the characters.
- You can now save the screen data file (including the new character definitions) by selecting the Save Data File icon (icon 11).
Pull-Down Menu 3 (CHAR) may be selected enabling you to use the following options:
- Animate - Animates any character where more than one frame is used, i.e. Repton, Monster and Spirit.
- Unset pixels,
- Invert pixels,
- Wipe - Clears the character window to the current colour.
The Screen Designer
Note: The program will not allow you to edit any of the supplied Repton 3 game screens unless you are able to give the appropriate edit code numbers (displayed after each screen has been completed).
- Select the Screen Designer by selecting icon 6.
- Screen A is now selected. To redesign another screen, select Pull-Down Menu 4 (MAPS) and move down the menu to the required screen (A-H).
- Select a character for placing on the screen map from the set of miniature character icons displayed at the bottom of the screen.
- Move the pointer to the main display are.
- Place the chosen character onto the amp in the desired locations by moving the pointer and pressing RETURN. (See the glossary below for further information).
- Repeat steps 3-5 until you are satisified with the redefined screen.
- Repeat steps 2-6 of you want to redefine other screens.
- To redefine the screen colours, move the pointer to the pallette (icon 15) and press RETURN over a colour. Press RETURN repeatedly to alter this colour to one of the other available colours.
- Select the Passwords icon (icon 10) if you want to define the screen passwords. By default, the passwords are "A" to "H" screens A to H.
- Select the Time-Limits icon (icon 9) to set the time-limit for each screen.
- Select the End-Zone icon (icon 13) when you have finished redesigning the screens.
- You can now save the new screens by selecting the Save Data File icon (icon 11).
Glossary
| Character | ||
| Repton | 1 | Placing Repton on the screen determines his starting position. Otherwise, he always starts in the top left-hand corner |
| Rock | - | Rocks will fall if unsupported |
| Diamond | - | All the diamonds on a screen must be collected |
| Blank Space | - | Use blank spaces to erase other characters on the map |
| Earth Sections | - | Repton can dig his way through earth |
| Barrier Sections | - | The flat-topped variety supports rocks and eggs but they will fall off the curved-top barrier sections |
| Skull | - | Skulls are deadly if touched. They are good objects to use when constructing mazes |
| Fungus | - | A dangerous creeper. It grows rapidly and is deadly on contact |
| Crown | 1 | There should be one crown on each screen |
| Egg | 4 | Eggs hatch into fearsome monsters |
| Safe | - | Each safe contains a diamond |
| Key | - | When Repton obtains a key, all the safes on the screen open to reveal their diamonds |
| Spirit | 8 | Spirits must be carefully placed on the screen so that they will follow the walls to their left-hand side |
| Cage | 8 | When a spirit enters a cage, it changes into a diamond. Ensure that you place as many cages on screen as you have spirits |
| Time-Capsule | - | Consuming a time-capsule resets the time-bomb's clock |
| Time-Bomb | 1 | Repton must defuse the time-bomb once he has collected all the treasure and killed all the monsters |
| Transporter | 4 | Position the transporter on the screen by moving the pointer and pressing RETURN at the desired location. Now, keep the RETURN key pressed and move the pointer to your chosen destination point for the transporter. Releasing RETURN will now store that location as the transporter's destination point. |


