


Introduction
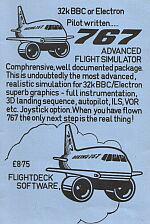
Comprehensive, well documented package. This is undoubtedly the most advanced, realistic simulation for 32K BBC/Electron. Superb graphics - full instrumentation, 3D landing sequence, autopilot, ILS, VOR, etc. Joystick option. When you have flown 767 the only next step is the real thing!
Contents
Section 1. Basic Flying Techniques
Section 2. Instrumentation
Section 3. Navigation
Section 4. ILS, Overshoot and Holding
Section 5. Landing and Takeoff
Introduction
The purpose of this manual is to guide you through twelve lessons. The lessons are in the form of exercises and deal with various aspects of the Simulator. The lessons are at the end of each Section and are constructed to put into practice the subject theory in that section.
Throughout the text reference will be made to instruments, these will be named and numbered... EPR 10. The number refers to the instrument panel decode on the next page.
Control is by the use of joysticks and keyboard or just keyboard. If you do not want to use joysticks you can nominate 'keyboard control' by pressing DELETE after the 'update' page has been passed and the instrument panel drawn.
Loading Instructions
Load the program in the usual way by typing CHAIN"767". If you have a Disc Filing System fitted the introduction will reset PAGE otherwise the program would not load.
The tape will run on both the BBC and Electron micros. Sound is available on the BBC. You will need to increase the volume by pressing the COPY key.
In the event of a computer crash, press BREAK. This will reset the program memory.
Section 1. Basic Flying Techniques
To fly the simulator you will need to master the use of the flying controls. If you have joysticks determine which one controls power and which controls the flight controls. If you are going to use keyboard controls the keyboard overlay shows the keys that replace the joysticks.
Fig 1.1 (on the keyboard overlay) shows the effects of the joystick movements. The first lesson will be to fly straight and level. This means in a straight line and not climbing or descending. This implies level wings and the correct aircraft attitude (or angle of attack). The correct attitude to fly will depend on the aircraft speed and power setting. Typical figures are given in Fig 1.2. These will become more familiar with use.
Lesson 1
Load the program, pass the 'update' page (by pressing any key) and the computer will now draw the instrument panel. Set the engine power to between 1.25-1.35. This is shown on the EPR..10 gauge; the airspeed will settle around 225-235 knots, shown on the Airspeed Indicator, ASI..11. Throughout this lesson, you will notice that the Autopilot Progress Display APD..3 shows that you have been operating with the Position Hold (POS.HOLD), Altitude Hold (ALT) and Heading Hold (HDG) modes engaged.
Referring to Fig 1.2, try setting different EPR's and observe the ASI and Attitude..1 to see that they agree approximately with those in the table. Now change the flap setting, check that the Flap Position Indicator..9 agrees with the flap selected. Caution: Do not fly below the correct speed for the flap selected; these speeds are known as the flap speed schedule and the speeds that maintain a safe speed margin above the stalling speed. If you inadvertantly allow the airspeed to drop below 1.2*(Stall Speed) a warning will appear in the Warning Computer..8 panel. Further reduction in speed will result in the aircraft stalling; the Autopilot will automatically disengage, the aircraft will descend rapidly out of control and crash!
Lesson 2
This lesson is the same as Lesson 1 except that you should not fly the aircraft manually. The first step is to disengage the attitude hold, check that the mode has been disengaged (using the Autopilot Progress Display (APD)..3). Not maintain 3000', by setting the correct Attitude (1 and EPR..10). To help us maintain level flight, a Vertical Speed Indicator (VSI..4) is provided. Obviously zero vertical speed is level flight.
Having mastered level flight, disengage the heading hold mode. Look at the Artificial Horizon (AH..1) and roll the wings level. Notice that, with wings level, the aircraft heading (5) does not vary. Now practise turning onto different headings while maintaining 3000'.
Lesson 3
Now you can practise climbing and descending. To assist us set up good rates of climb or descent the VSI (4) is used. To climb and maintain speed requires an increase in power and to descend at the same speed requires less power. Practise climbing and descending at different speeds and flap settings.
Lesson 4
We now introduce the cncet of a Rate One Turn. This is a turn at the rate of 3'/sec, or 360' in 2 mins. The rate at which we turn depends on speed and angle of bank; a practical relationship for Rate 1 is:
Required bank angle for Rate 1 = (Airspeed/10)+7 Degrees
Rate 1 turns are often required at holding speed, that is 210kts, 28'. Using the stopwatch, practise rate 1 turns. Try climbing and descending whilst doing rate 1 turns. Restrict your rate of climb or descent to 1500'/min or less.
Lesson 5
A jet aircraft has a large speed range, typically 100-500kts. In this lesson, we will see just how long it takes to slow down. Also, the right places to extend flaps and lower the landing gear. Reset the simulator
FURTHER INSTRUCTIONS CURRENTLY UNAVAILABLE


