
Introduction
Professional quality pictures are easy to design with this easy-to-use comprehensive graphics package. It can be controlled by keyboard or joysticks so simply load the program and away you go. Create your own works of art!
The Art Studio can produce pictures in Modes 4 or 5 and you can save your pictures or load them back into The Art Studio for modification.
Here's a list of the main functions:
| * | Draw | * | Draw a square | ||
| * | Zoom | * | Draw a rectangle | ||
| * | Move | * | Draw a triangle | ||
| * | Copy | * | Stipple brush | 100 brush sizes |
|
| * | Flip in X axis | * | Spray brush | ||
| * | Flip in Y axis | * | Paint brush | ||
| * | Fill an area | * | Draw a line | ||
| * | Fill an area with patterns | * | Draw a dotted line | ||
| * | Draw a circle | * | Draw rays | ||
| * | Draw an elipse | * | Erase | ||
| * | Inverse | * | Set flashing colour speed | ||
| * | Write text | * | Paint patterns | ||
| * | Write large text | * | Wipe screen | ||
| * | Write shadowed text | * | Save picture | ||
| * | Write outlined text | * | Load picture" | ||
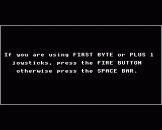
When the program has loaded you will see a blank screen with a control panel at the bottom (see below) and a cursor on the screen. The cursor is moved around the screen using a joystick (if selected) or by the following keys:-
Z - Left, X - Right, * - Up, ? - Down
The cursor can be moved anywhere on the screen except the two lines used for the control panel at the bottom.
Before starting to design a picture, it is recommended that you try out each of the commands detailed below. This will prevent any costly mistakes and show you the full power of The Art Studio. It is infuriating to spend a lot of time drawing a piece of work only to find out that a simple command could have done it for you.
The Control Panel
| ______________2_____________________________3______________ |_____________________________|_____________________________| |___|___|___|___|___|___|___|___|___|___|___|___|___|___|___| 1 3 4 5 6 7 8 9 10 11 12 13 14 15 16 |
1. Drawing And Selecting Options
This option is automatically highlighted when you load The Art Studio. When selected, moving the cursor will leave a trail of the currently selected colour (see 2 and 8 below to find out how to select different colours).
To leave this option, press SPACE and then use keys A and S to highlight another option. When the option you wish to use is highlighted, simply press RETURN to select it.
2. Currently Selected Colour
The currently selected colour is shown by the arrow (ignore the numbers in the boxes for now). To change to a different colour, press C. (Mode 5 pictures are produced from four colours and Mode 4 pictures are produced from two colours but are more detailed). You can change to a different colour at almost any time during your design work.
There are other colours available (including flashing colours) if you do not want to use those shown on the control panel. To find out how to obtain these, see 8 below.
3. Line
This allows you to draw straight lines of any length and at any angle. Moving the cursor will cause a line to be "dragged" out. When you have the line in the position you want it simply press RETURN to "paste" the line to the screen. (If you have a joystick, simply press the FIRE button).
Also you can:
- Press O to toggle between a dotted or solid line.
- Press DELETE to move the first point of the line to the current cursor position.
- Press C to change the colour.
- Press SPACE to leave the option.
4. Shape
This allows you to produce a variety of shapes of different sizes and "paste" them to the screen. After selecting this option a new menu will appear.
  ___________________________________________________________
  |_____________________________|_____________________________|
  |___________________|___________________|___________________|
   A    B    C
  Oblong/Square  Elipse/Circle   Triangle
Circles And Squares
When you have elipse or oblong selected, press DELETE to change them to perfect circles or squares.
You can press D to toggle the dotted option and you can choose to have the shape filled or unfilled (see 13 below). The only things you cannot have are a filled dotted elipse or a dotted triangle.
Press SPACE to leave the option.
5. Brush
When you select this option, a new menu will appear:
___________________________________________________________
|_____________________________|_____________________________|
|_________|_________|_________|_________|_________|_________|
A  B  C  D  E  F
- Circular brush
- Stippled brush
- Spray can brush
- Square brush
- Size of brush (100 sizes)
- Pattern selection
When you select option "e", you will be asked for a brush size between 1 and 100. This determines the size of all future painting with brushes in this menu.
If you select the last option, you will be asked for a number between 0 and 255. Selecting 0 will proceed as normal but any other number will cause interesting stripey effects which are well worth experimenting with. Once selected it will also affect other options such as the circle, rays and perhaps most importantly fill.
Press SPACE to leave the brush option.
6. Saving Pictures
If you select this option, you will be shown two numbers and asked to press a key. You will then be asked for a name for your picture. Pressing RETURN will now 'save' the picture to either cassette or disk.
Pressing ESCAPE will abort the saving of your picture and return you to the draw command.
Please note - Do not save your pictures to the Art Studio cassette/disk as you may damage it. Always use a blank cassette or disk.
7. Loading Pictures
Use this option to reload any of your pictures. Once loaded, it may be necessary to reset the colours and flashing colour rates to return it to its original state.
8. Changing Colours
Mode 5 - You can change the colours shown in the control panel boxes by using keys 1, 2, 3 and 4. Key 1 controls the first colour. Keep pressing it until it becomes the colour you require. The same applies for the other three colours. You can also change the speed at which colours flash. Keys 5 and 6 control the speed of the first flashing colour and keys 7 and 8 control the speed of the second.
Mode 4 - Use keys 1 and 2 to change the colours and keys 3, 4, 5 and 6 to change the flashing colour rates. Press SPACE to finish the option.
9. Fill An Area
If you select this option, it will fill the area around the cursor with the currently selected colour. Use it with caution as it can have disasterous results if you use it in the wrong places. A useful tip is to save your picture at regular intervals as you are working.
The fill option will only fill relatively simple shapes. Complex areas may need more than one attempt to completely fillL them. Remember that if you have a pattern selected, the shape will be filled in a pattern.
10. Zoom
This extremely useful feature is essential for really detailed work. When selected it will show a "blown-up" grid of the area around the position of the cursor. You can then alter individual pixels on the screen to get the effect you require.
Control the cursor in the "zoomed-in" area in the same way as the ordinary cursor. Use the RETURN key (or fire on the joystick) to place a pixel of the currently selected colour in the boxes on the grid. Your picture will be altered as you work.
A box with the currently selected colour will appear in the bottom corner of the screen. The colour can be changed at any time by pressing C. Press SPACE to finish the option.
11. Text On Pictures
This option allows you to type directly onto the screen. Once selected, you will be asked if you want Shadowed writing, Outlined writing and finally Large writing. You can then type to the screen and finish the option by pressing RETURN.
A joystick will move the cursor to a new position to put your text. To use key cursor controls you will need to press CTRL as well as the direction key (Z, X, etc) otherwise it will print the character to the screen.
For Shadowed and Outlined writing, you will be asked for the two colours in which you wish the text to appear. These colours are selected by the C key and by pressing RETURN. You first select the colour of the background (or outline) colour and then the main text colour. Please note: you cannot have Outlined writing if you have selected Shadowed.
12. Rays
This is very similar to the Line command except that the lines will all be drawn from the same starting point giving the impression of rays. Press RETURN or FIRE to draw a ray. Press D to get dotted rays. Press C to change colour. Press SPACE to finish the option.
13. Filled Shapes
When this option is selected, it will cause any shapes that you produce to be automatically filled in the currently selected colour. To deselect this option, press RETURN whilst highlighted.
14. Inverse
This option results in all drawing (lines, circles, etc) to be inverted with what is already on the screen. Also see 16(e). To deselect this option, press RETURN whilst highlighted.
15. Rubber
This allows you to rub out mistakes in your work. Change the size of the rubber using the < and > keys. Also, you can hold down SHIFT to make the size change larger. Press SPACE to finish the option. Detailed "rubbing out" can be done with the zoom feature.
16. Area Sub-Menu
When selected, a new menu will appear. The facilities in this menu allow you to perform some clever actions on areas of the screen.
  ___________________________________________________________
  |_____________________________|_____________________________|
  |_________|_________|_________|_________|_________|_________|
   A  B  C  D  E  F
| a. | Left/Right Flip | - | flips the currently selected area from left to right. |
| b. | Up/Down Flip | - | flips the currently selected area from top to bottom. |
| c. | Move | - | moves the currently selected area to a new location. A square of the same size as the selected one appears and can be moved to the new location. If INVERSE is selected (see 14 above) the bits (pixels) moved or copied are inversed as well thus not destroying anything beneath it. Move the square using the movement keys or joystick and press RETURN (or FIRE) to move the area. If you are not happy with the selection, press SPACE to deselect it. |
| d. | Copy | - | This copies the area as with MOVE but also leaves the original area in place. |
| e. | Over | - | This works in the same way as INVERSE to prevent background detail being lost but only affects options in this sub-menu. This gives the effect of the MOVEd (or COPYied) area appearing "behind" what is already on the screen. |
| f. | Wipe | - | This option wipes the whole screen clean. You must select it twice to avoid accidents. If you accidentally select it press any other key other than RETURN to de-select it. |
To change the shape and size of the area on which you are working, or to Move or Copy the area, use CTRL and the movement keys or the joystick. Use the A and S keys to highlight options and RETURN to select them. Note that you can use SHIFT to speed up area selection or moving and copying. Press SPACE to return to the main menu.
How To Load Pictures In Your Own Programs
After you have saved a picture and want to load it into the computer but not into The Art Studio, you will need to type in a small program to make it appear correctly on the screen.
The computer needs to be told the colours that you selected and the speed of the flashing colours. This information is given in The Art Studio. Write down the four numbers next to the colour boxes (calling them A, B, C, D) and also the two numbers given when you were saving the picture (calling them E and F).
Now type in the following program, replacing A, B, C, D, E and F in the first six lines with the numbers you have written down. Also replace the word MYPIC in the last line with the name of your picture:
| 10 A%=A 20 B%=B 30 C%=C 40 D%=D 50 E%=E 60 F%=F 70 CLS:VDU 18,0,31,19,29 80 VDU 19,0,A%;0; 90 VDU 19,1,B%;0; 100 VDU 19,2,C%;0; 110 VDU 19,3,D%;0; 120 *FX9,E% 130 *FX10,F% 140 *LOAD MYPIC |
Do not include these lines on the Mode 4 version Do not include these lines on the Mode 4 version |
Please note that line 70 produces a text window at the bottom of the screen so that you cannot type something over the picture after it has loaded. It can be left out if you do not require it.
You can then type MODE 4 or MODE 5 (followed by RETURN) depending on the Mode used. Put the cassette or disk containing your picture into the recorder or drive. Press PLAY.
Type RUN and press RETURN. Your picture will now be loaded onto the screen exactly as you produced it. (The load address for your information is &5800 although the picture will automatically be loaded at that address).


