Playing Instructions
Load the game from the PIPELINE GAME side of the cassette.
Most of the Game Control keys can be redefined: follow the instructions given on the loading screen.
(If you wish to design your own missions, the design files have to be loaded from side 2 of the cassette, as discussed below.
Game Objective
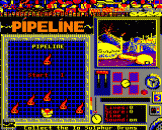
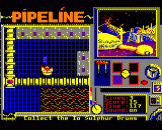
In order to complete your mission, you must collect all the Sulphur Drums from each of the four extraction platforms in turn. You will need to travel through the pipeline complexes. Once in a pipeline, there is no going back: at junctions, you will be carried along in a predefined way. You will also need to use various objects, such as the Blueprints (for teleporting), a Detonator and a Space Burger. You will have to work out how to use these objects to help you to solve the many complex and inter-related puzzles present on each of the platforms. You will need to move carefully to avoid the Stationary and Moving Flames, the Carnivorous Plants and the areas of Burning Sulphur, otherwise you will lose a life. You start with three lives. Speed is also necessary, as the platforms will be destroyed by flames after a fixed period of time (unless you can reset the time), and a life can be lost.
When you have collected all the Sulphur Drums on a platform, you should find the small Control Robot and pick him up. This will allow you to move on to the next platform, or, after completing the fourth platform, will permit you to leave the extraction platforms and return to Earth, having successfully completed the mission. But beware! The Control Robot is programmed to destroy its platform and you with it. Having picked up the robot, you must quickly move as far away as possible until the platform destruction has been initiated, otherwise you will lose a life.
Scoring
Collecting a Sulphur Drum = 1 point
Extinguishing a Moving Flame = 25 points
Picking up Control Robot without being destroyed = 100 points
Each time unit remaining on completion of a platform = 1 point
Game Controls
| SPACE | ... | Play Game |
| Z | ... | Move West |
| X | ... | Move East |
| * | ... | Move North |
| ? | ... | Move South |
| P | ... | Pick Up Object |
| D | ... | Drop Object |
| RETURN | ... | Use Object |
| T | ... | Throw Object |
| M | ... | View Map |
| S | ... | Sound FX On/Off |
| < and > | ... | Select Object |
| ESCAPE | ... | Kill Yourself (Useful if you become trapped) |
| SHIFT-ESCAPE | ... | Restart Game |
Level Editing Codes And Competition Entry Code
On completing a platform, a level editing code will be given. This will permit you to redesign the level using the Level Designer.
On completing the fourth platform, and hence completing the game, you will also be given a competition entry code. If you wish to enter the competition, you should carefully note the competition entry code. Then, on pressing SPACE, your final score will be given, which should also be noted.
A valid competition entry code will only be given if the game is completed in full in its original form.
Further competition details are given on the Pipeline Competition entry card.
| Level 1 | 67736 | Level 2 | ||
| Level 3 | Level 4 |
Mission Design
Designing your own missions is a three stage process.
- The Graphics Designer is used to modify the default graphics or to design completely new graphics.
- The Level Designer is used to modify a given level (once the editing code is known) or to design completely new levels.
- The Mission Generator is used to combine a graphics file with four level files to give a complete mission, which is saved as a mission file.

To play a newly designed mission, load the Pipeline Game as normal. Then press "L" followed by the mission filename to load your new game. Press SPACE to play the game.
Initially the Mission Generator contains four blank levels. If you wish to play through a single new level, this should be loaded into the Mission Generator as level 1 and the mission should then be saved with three blank levels (levels 2, 3 and 4).
The Mission Generator can also be used in the reverse direction, i.e. to obtain individual graphics and level files from a mission file, for example from the Pipeline Game mission file "IO". However, these levels can only be redesigned in the Level Designer if the editing codes are known. The IO file is "locked" hence it is not possible to save any mission derived from the IO file.
Graphics Designer
Select the MISSON DESIGN side of the cassette. Type CHAIN"GRAPHIC" and press the RETURN key. This will load in the Graphics Designer.
To load in a Graphics file, you should pull up the Environment Menu (press 8) and select "Load File" using the Up Cursor and Down Cursor keys followed by RETURN. The following instructions assume you have loaded in the DEFAULT graphics file by selecting "Load File" and typing in DEFAULT.
Note: To exit from the Graphics Designer, press BREAK.
On loading the Graphics Designer (with DEFAULT graphics) you are presented on the left with a large editing window and two small editing boxes, and on the right with 25 large game sprites and 16 small object sprites. The DEFAULT set of game and object sprites are illustrated overleaf (but with the background pattern missed out from all the sprites).
To select a sprite for editing, use the Cursor keys. When an object sprite is selected, its name is shown in the large editing box.
To edit a sprite, use the Z, X * and ? keys to move the editing cursor around and RETURN to colour in a pixel. To select the pixel colour, use keys 1, 2, 3 and 4.
To access the more advanced features of the editor, use the following keys to pull up menus:
Options A - 6
Options B - 7
Environment - 8
The Up Cursor and Down Cursor keys can then be used to select from a menu, followed by RETURN. Alternatively, some of the features can be selected using CTRL-key combinations, without using the pull-up menus.
| Options A | Options B | Environment | |||
| Flip X Flip Y Delete Undo Animate Obj name |
CTRL-X CTRL-Y CTRL-DELETE CTRL-U CTRL-A CTRL-N |
Swap Copy Overlay Underlay Remove Backing |
CTRL-S CTRL-COPY CTRL-O CTRL-R CTRL-B |
Load Sprite Save Sprite Load File Save File Def. Colour |
CTRL-C |
To exit from a pull-up menu, press ESCAPE
Although most of the features in the Graphics Designer are relatively straightforward to use, the following notes will help you in learning how to use the system.
Sprite 1, the Background Sprite, is not a 'full' sprite. As you edit it, the designer will adjust it for you, but it is advisable to try and ensure that the sprite remains the same when flipped using 'Flip Y'. Selection of 'Backing' in Options B will underlay the Background Sprite beneath whatever sprite you are editing.
Sprite 6 (Wall 1A) is used in the Level Designer as an alternative to sprite 11 (Wall 1B). Either one of these sprites can be used on any one level. The only premitted way to use both sprites on one level is in a chequered pattern (See the Level Designer instructions). Similar alternative rules apply to sprites 7 and 12 (Walls 2A and 2B), sprites 8 and 13 (Collectables A and B) and sprites 9 and 14 (Fatal traps A and B).
Sprite 10 (the Stationary Monster) together with sprite 15 provide animation for the Moving Monster. Animation of the Hero (sprites 22, 23, 24 and 25) uses a flipping technique.
All the object sprite names can be changed except for the name of object 16, which cannot be changed from 'Finish Block'.
Selection of 'Def. Colour' from the Environment Menu allows you to check the various colour combinations possible for the graphics set. When however the graphics file is combined with the level design files to generate a mission, the colours of each level are determined by the level design files, not the graphics file.
To define the colours, move the bar to the colour you wish to change using the Up and Down Cursor keys, and change the colour with the Left and Right Cursor keys. To finalise the colour change, use RETURN or SPACE.
Loading and saving is carried out from the Environment Menu.
Only graphics files, i.e. complete sets of sprites, can be loaded or saved using the cassette system. Do not attempt to save onto the Pipeline cassette itself. Only save onto a separate cassette.
Level Designer
Select the MISSION DESIGN side of the cassette.
Type CHAIN "LEVDES" and press the RETURN key.
To exit from the Level Designer, press BREAK.
The flashing red cursor in the centre of the screen can be moved around using the Z, X, * and ? keys. Editing features are obtained on pull-up menus by using the following keys:
| Menu Name | Function | Key |
| Select Options Files Help |
Block Selection Level OptionsLoading and Saving Helpful Utilities |
1 2 3 4 |
To select an option from a menu, use the Up Cursor and Down Cursor keys to highlight the option and press RETURN. To exit from a menu, press ESCAPE.
The following types of block are available from the "Select" menu:
| Blank SE curve SW curve NE curve NW curve Wall 1 Wall 2 Collectable Fatal trap Stationary Monster Crate MarkerHorizontal Pipe Vertical Pipe Junction Barricade |
Blank space Curved wall section, pointing south-east Curved wall section, pointing south-west Curved wall section, pointing north-east Curved wall section, pointing north-west Solid wall section Another solid wall section Block which can be collected and scores 1 point Block which will kill the player Stationary monster which will kill the player Impassable block, which can sometimes be pushed Impassable block, destroyed by a moving monster Horizontal pipe section Vertical pipe section Pipe junction Impassable wall section, often used as a door |
Once you have selected a block and pressed RETURN, you can place it anywhere on the map by moving the flashing red cursor to that location and pressing RETURN.
Horizontal pipes can only be entered from the east or from the west, and vertical pipes only from the north or from the south. If a pipe leads to a junction section and there is a pipe leading away to the left, the player will turn left, otherwise theplayer will turn right or, if there is no left or right exit, will keep going forward. If the junction is completely isolated then the player will bounce back.
The following options, which determine game play on a level, can be selected from the "Options" menu.
|
||||
On selecting 'Start' of 'Finish' you are presented with a three option menu. 'Define', 'Display' or '<<>>'. If you select 'Display', then the cursor is moved to the point's location on the map. If you select 'Delete', then the cursor is moved to the point's location on the map. If you select 'Define', then a 'Select Location' box will appear. When a 'Select Location' box is on the screen, you should move the cursor to the location you want to specify (in this case, the start or finish points on the level) and press RETURN. You can cancel the 'Select Location' box by pressing SPACE.
There are eight objects allowed to be used on each level, numered 1 to 8. After selecting this option, enter the number of the object you wish to define. You will now be presented with an eight option menu.
'Position' defines the initial position of the object.
'Exist?' determines whether or not the object is used in the level.
'Sprite no.' selects an object sprite by the number (from 1 to 15) given on the graphics designer. Sprite 16, the 'Finish Block' cannot be used as an object.
'Charge' determines the number of times, between 0 and 31, that you can use an puzzle (See 'Puzzle').
'Charges', if unticked, permits an object to be used without limit on the number of times, subject to puzzle conditions.
'Vanish' determines whether or not the object will vanish when its last charge is used. If an object has no charges to begin with, then it won't vanish until it has been charged and used.
'Throw' determines whether an object will or will not be automatically 'used' when it lands, after being thrown.
Up to four moving monsters, numbered 1 to 4 for reference, can be present on any level.
On selecting 'M.Monster' and entering the monster's number, you are presented with a six option menu.
'Position' determines the initial position and 'Direction' the initial direction of the monster. If you select the option 'Dead' on the 'Direction' menu, the monster won't appear on the level, unless its direction is changed (See 'Puzzle').
'Pattern' determines the way a monster will move. The patterns available are: 'Back and forth', 'Follow edges', 'Left wall', 'Right wall' and 'Special'. The 'Special' option allows you to define a monster's direction priorities. When a monster hits a block whose type is selected by 'Killed by', it will die, leaving in its place a block of the type selected by 'Result'. For example, on some levels of the Pipeline game, if a monster hits a 'Fatal trap', it turns into a 'Collectable'. Whenever a moving monster is killed, the player scores 25 points.
Puzzles are exceptions to the normal rules of the game. Thirty-two puzzles are permitted for each level, numbered 1 to 32. When 'Puzzle' is selected you are presented with a six option menu.
'Name' allows you to give each puzzle a name up to twelve letter long, including spaces. This is simply for convenience and has no effect on the puzzle.
'Type' selects the type of puzzle. (See the 'Puzzle Types' box.)
'Status' has a four option menu that determines whether a puzzle is activated by an object, whether it will work initially, or has to be turned on by other puzzles, and whether it can be used more than once. If the 'Use object n' is ticked, the puzzle will only be activated when the specified object (object number 'n' is used). The number 'n' is dependent upon the puzzle number:
|
|
|||||||||||||||||||||||||||||||||||||||||||||||||||||
'Conditions' has a nine option menu which determines the conditions under which the puzzle will be activated. Only if all these criteria are satisfied will the effects of the puzzle (see below) occur.
'Position' determines where the player must be to activate the puzzle.
'Check X', if unticked, then the player can be anywhere on a row.
'Check Y', if unticked, then the player can be anywhere on a column.
If neither 'Check X' nor 'Check Y' are ticked then the puzzle will be activated wherever the player is, and if both are ticked the player must be in the location specified by the 'Postion' option.
'Next block' determines the type of block the player must be facing.
'Check next', if unticked, allows the player to face any block.
'Direction', is the direction in which the player must face.
'Check dir.', if unticked, allows the player to face in any direction.
'Collects', if ticked, indicates that the player must have collected all the collectables as specified for the level.
Upon selecting this option you will be told you many collectables there are on the map, and asked how many the player needs. The two values can differ because it is sometimes possible to have more collectables on the level than it is actually possible to reach. A maximum of 250 collectables is allowed as an initial requirement. Once all collectables have been taken, the player may either proceed to the finishing space or collect more collectables for bonus points.
The Graphics menu allows you to change the colours of the level, as well as selecting which sprites will appear. Four of the block types listed in the menu (Wall 1, Wall 2, Collectable and Fatal trap) can each be displayed as one of two sprites (see the Graphics Designer instructions). Only one out of each of these sprite pairs can be displayed throughout each level, except if they are arranged in a chequered 'Pattern'. You can use the Graphics menu to determine this.
Time goes down at a constant rate, whether the player is moving or not, but not when moving through a pipe or looking at the map. The maximum time allowed to a player is 250 units, but you may find that this is not enbough. In this case, you could use a puzzle to reset the player's time, or use the Mission Generator to change the rate at which the time goes down (see the Mission Generator instructions).
This utility completely wipes the level. The map is cleared and the options are reset. This cannot be reversed.
Place block - is particularly useful for such puzzles as one-way corridors, where a barrier cuts off the player's retreat once a certain point is reached. You must specify a block type and position.
Move block - moves a block anywhere on the map in the direction you choose. It can be used, for example, to bring doors crashing shut behind the player.
Next block - puts a block in front of the player. It is useful for objects like keys, when the block type would be a 'Blank'. All you have to select is which block type you want.
Set levels - changes the player's time and/or the number of collectables to collect (depending on which 'Change' options are ticked). This puzzle type can be used with food, to reset your time. The collectables option allows you to have 'Short-cuts' in the level.
Throw object - is similar to throwing an object by pressing 'T' when playing the game, but you can specify the distance that the object will travel before coming to rest (unless, of course, it hits something). One example is a gun, which should 'throw' bullets further than the player could.
Detonate object - creates an explosion centred around the object you specify. This explosion destroys everything in the squares adjacent to the object - including the player, if the puzzle is activated whilst the player is near the object being detonated. The player will also be killed if carrying the object when it explodes.
Move monster - is used to change a monster's direction. When the puzzle is activated the monster will immediately start moving in the direction you chose, although if the monster was already travelling in this direction the puzzle will have no effect. The pseudo-direction 'Dead' will kill the monster concerned, and this usage of the puzzle is convenient for fire extinguishers, among other things.
Place monster - completed changes the details of a monster, including its position, pattern and direction. You can use this puzzle to create the illusion of having more than four monsters on one screen.
Teleport - moves the player to any location on the map. You must indicate with the 'Select Location' cursor the place to which the player will be teleported.
Swap next block - will toggle the block in front of the player between two types, e.g. Horizontal Pipe and Vertical Pipe. If the player is facing one of these blocks when the puzzle is activated, it will be changed into the other block. The puzzle type can be used, for example, with the screwdriver object.
Turn on puzzle - turns up to three other puzzles on. The menu for this type contains the three 'Puzzle number' options plus a 'Single' option. If this 'Single' option is ticked then all three puzzle numbers are the same, so when the puzzle is activated, only one other puzzle is turned on.
Turn off puzzle - is similar to 'Turn on puzzle', but instead of turning puzzles on, it turns them off. If placed at the entrance to a room, these puzzle types can be used to make sure that a particular puzzle is only activated within that room.
Charge object - is used to change the number of charges (i.e. possible usages) of an object. The object number and the revised number of charges must be specified.
Push crates - allows the player to push a certain number of crates. You choose how many. Note: the 'number of crates' the player can push is really the number of times they can push any crate one square. IF you specified six, for example, the player could push two crates three squares each, or three crates two squares, or one crate six squares.
Move next block - moves the block in front of the player in a direction relative to the way the player is facing. Possible directions are 'Forwards', 'Backwards', 'Left' or 'Right'. If something is blocking the path of the block to be moved, the puzzle won't be activated. Since the direction is relative, if the player was facing west and the chosen direction was forwards, the block in front of the player would move west, leaving a blank space behind it.
Disorientate - reverses the player's controls, so that west becomes east, north becomes south, etc. Non-movement related keys like 'Pick up' and 'drop' remain the same. (Object selection is unaffected.) If this puzzle is activated twice, or if the player loses a life, the player's controls will return to normal.
On selecting 'Files' you are presented with a five option menu.
'Load level' loads a level from cassette. 'Save level' saves a level to cassette.
'Edit code' changes the existing code of the level. 'Exit' executes a BREAK.
The editing code is displayed whenever a level is completed. When a level is to be loaded into the designer, or saved to cassette from the Mission Generator, the editing code of the level must be typed in. The default editing code for a level is 123456.
So that you can practise using the Level Designer to redesign a level, Level 1 of the Pipeline game has been included on the cassette under the filename 'LEVEL1'. The editing code is given above.
Do not attempt to save onto the Pipeline cassette itself. Only save onto a separate cassette.
On selecting 'Help', two utilities are available.
When the 'Find puzzle' option is selected, you must enter the name of a puzzle. The program will then check the list of puzzles to see if there is a puzzle with this name. If there is one, the program will inform you of that puzzle's number and proceed into the 'Puzzle' menu.
'Simulate' allows you to test movement through a pipeline directly on the Level Designer screen. When the option is ticked, the utility is in operation, but can temporarily be turned off by holding down SHIFT. The simulate feature is automatically cancelled when a function key is pressed.
Mission Generator
Select the MISSION DESIGN side of the cassette. Type CHAIN"MISSION" and press the RETURN key.
To exit from the Mission Generator, press ESCAPE.
On loading the Mission Generator, you are presented with the following menu:
- to change name
- to change features
- to load graphics
- to save graphics
- to load a level
- to save a level
- to load a mission
- to save a mission
To select an option, use the Up Cursor and Down Cursor keys or the number keys to highlight the option and press RETURN.
The features are options which apply to all levels.
| Time consumption Mapping ability Backpack size Throwing distance |
The rate at which the player's time goes down (1-16) The number of level mpas the player can view (0-4) The number of objects the player can carry (2-4) The distance, measured in squares, that the player can throw objects (0-63) |
The graphics, level and mission files can be loaded from, and saved to, cassette.
Do not attempt to save onto the Pipeline cassette itself. Only save onto a separate cassette.


